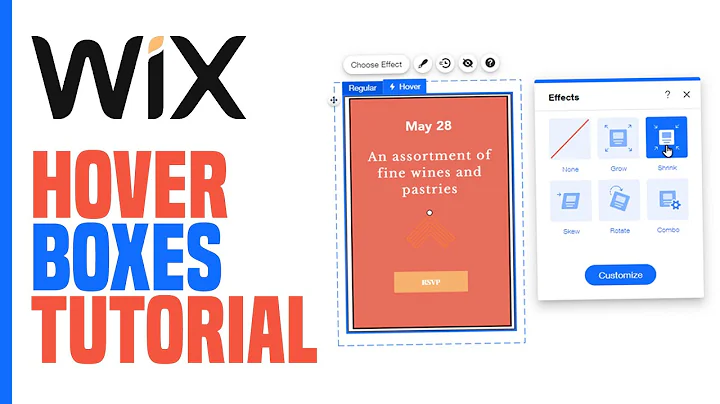
How To Use Wix Hover Boxes | Step By Step Tutorial (2024)
How To Use Wix Hover Boxes | Step By Step Tutorial (2024)
Hey there! Welcome back to one of your favorite digital hangouts. Today, we're diving into a super cool feature on Wix—a hidden gem if you ask me. We’re talking about Wix Hover Boxes. If you've ever wondered how to add that snazzy hover effect to your website where a box expands or changes when someone hovers over it, you've landed in the right spot. Trust me; it’s a game-changer for making your site more interactive and visually appealing. So buckle up, and let's get started!
Before we begin, if you're new around these parts or you're still on the fence about Wix, lemme give you the lowdown. Wix is like this amazing Swiss Army knife of website builders. It's versatile, user-friendly, and loaded with a ton of features that allow even newbies to create professional sites. Whether you want to craft an online store, build a portfolio, or start a blog, Wix has got you covered. And today, I'm going to show you how to work a bit of magic using one of its powerful features: Hover Boxes.
Getting Started with Wix
First things first, make sure you're all set up on Wix. If you haven't signed up yet, you might want to jump on that. You can easily register with your Google account, and boom—you’re all set. Head over to wix.com and get started. Once you're in, open up one of the websites you've been working on. For this walk-through, I’ll be using the Classic Wix Editor, but the process is pretty similar if you're using Wix Editor X.
Exploring Your Website Editor
Okay, you're in your editor's dashboard. Here's the game plan:
1. Navigate to Your Projects: Pick the site you want to add the hover box to. Trust me, this effect will spice up even the most mundane webpage!
2. Edit Site: Click on `Edit Site` for the project you're working on. This action will transport you straight to the Editor. Ah, the land of creativity and endless possibilities! 🌟
3. Adding Elements: On the left sidebar, you’ll notice a handy little button labeled `Add`—like a digital treasure chest. Click it, and you’ll find options for adding text, buttons, decoratives, social links, and more.
4. Select Box Options: Among the choices, you’ll see an option for `Box`. Click on it. Boom! You’ve discovered three options: Theme Boxes, Container Boxes, and Hover Boxes. Today, we’re going for the gold—`Hover Boxes`.
Crafting Your Hover Box
Now for the fun part—crafting your hover box!
Selecting and Adding a Hover Box
1. Pick a Layout: Based on your site’s theme or your personal flair, choose a hover box design. Drag and drop it into your workspace. It's really that simple!
2. Regular to Hover: Click on your box and toggle the option to switch it from regular to hover. Now, whenever you—or anyone else—hovers over this box, it transforms!
Customizing Your Hover Box
3. Edit the Details: Now that you’ve set up your box, customize it to suit your style. Here’s how:
- Change Images: Click on the box, then `Change Image`. Upload an image from your computer or choose one from Wix’s library of free media.
- Adjust Design: Go wild! Edit the background, border, shape, and more to match your vision. Add frames or change the color through the design settings.
4. Text and Links: Hover boxes can carry text too. Edit the text for that perfect message. And hey, why not add a link? Choose between a page, anchor, email, or even a document!
5. Play & Perfect: Run a quick preview to see your hover box in action. Make any final tweaks, and voilà, you’ve created a stunning visual interaction right on your webpage!
Final Thoughts
And there you have it! That’s how you seamlessly set up a fantastic hover effect using Wix Hover Boxes. Imagine all the potential creative elements you can add to your work. Trust me; your visitors are going to love it.
Before you go off to create your masterpiece, let’s talk about leveling up your skills elsewhere. At NewForm, we’re all about honing your design skills, finding marketplace opportunities, and connecting you with industry leaders. Join us for monthly design challenges, weekly skills workshops, and exclusive sessions with the crème de la crème of web design. Get access to invaluable resources, learn industry secrets, and showcase your newfound skills.
Ready to jump in? Join us on NewForm for more awesome content and opportunities. Let’s make some magic happen together!
Thanks for hanging out, guys! Don't forget to share this post if you found it helpful. And hey, leave a comment below about your favorite part or throw in any questions you have. Can't wait to see what you create with Wix Hover Boxes. Catch you at the next post—until then, happy designing!
---
Join NewForm! Hone your skills, join a vibrant community, and embark on your journey as a web design connoisseur. Discover limitless potential with us at NewForm. See you there!


