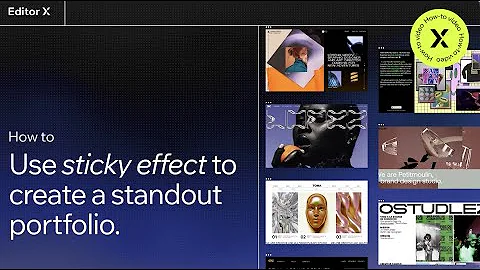
How To Use Sticky Effect To Create A Standout Portfolio | Editor X
How To Use Sticky Effect To Create A Standout Portfolio | Editor X
Hey there, creative wizards! 🎨 Are you ready to elevate your web design game and mesmerize all who visit your site? Today, we’re jumping into the world of sticky effects and floating cards—because, let's face it, a bit of visual drama never hurt anyone. Whether you're pimping up your portfolio, creating a stellar landing page, or just playing around with cool web elements, this tutorial is your golden ticket to a seamless, interactive user journey.
Imagine cards gracefully floating into position as you scroll through a webpage. It's not sorcery—it's sticky effect magic, and the best part is, you don't need a single line of code to make it happen. Ready? Let's dive right in!
Getting Started with Sticky Layouts
First things first—grab yourself a nice blank section. Traditionally, Editor X will size your section to 500 pixels, but we like to venture beyond the default settings. Switch it up to viewport height and set it for a spectacular 325%. We’re talking four rows here, folks; three for a sweeping 100%, and a neat 25% for that cherry on top.
Once you've laid your section groundwork, let's grid it up. Get cozy with those grids, setting them to four rows. Initially, they’ll distribute equally, but you’re the boss here. Adjust that layout to your heart's content.
Ready, Set, Container!
Drop in a container—it’s like placing the first brick in your design castle. You want this container to stretch across its grid cell. Next, wave your magic wand (okay, it’s just making it transparent) because this bad boy is going to hold our floating cards. Add your first image card, center it, and note that if it gets cropped, just jiggle the settings until it's reset. No cropping allowed!
Pro tip: Ensure your container is 35% off the container for that perfect floaty position.
Duplicate and Tilt—The Spell for Continuous Visual Drama
Your first card is sitting pretty, but let’s not stop there. Duplicate the whole container using that nifty command, make sure it's snug in row number two, and stretch it out. Switch up the image, add a cool 15-degree tilt to it, and watch as the magic unfolds.
Experience the sticky effect in all its glory as you scroll between the first and second containers. It's like flipping through a glossy magazine. 🎉
Got the hang of it? Time to rinse and repeat for your third container. Duplicate, drop it into the third row, and once again, stretch away. With each new image, weave a new tale. For this one, let’s rotate it a sleek -15 degrees for that yin and yang balance.
Adding a Background Animation
Now that we’ve stacked the cards elegantly, it’s time to pivot to the background. Place yet another container and throw in an image—make sure to stretch it. Choose a GIF for that added pizzazz, making sure it sits snugly in the back of your setup for a layered look without sticky scrolling. Watch as your cards dance over this animated canvas when previewed.
Final Touches and Previews
Almost there! Let's add an extra section to emphasize the stickiness even more. Another blank section should do. Set it to a nice tall 1000 pixels, and populate it with a striking image. Stretch it so it fills the section elegantly.
When you preview everything, your artistry comes alive! The GIF animates coyly in the background while cards perform their dramatic float and stick. Once scrolling ends, everything layers neatly, leading users to the next jaw-dropping section.
Wrapping It Up
Now that you've conjured your masterpiece using sticky effects, take a step back and admire what you’ve created. Remember, using percentages for sizes enables your design to look fab across all devices. A truly responsive web design makes your creativity accessible to everyone, everywhere.
At NewForm, we’re all about honing your design skills, helping you find opportunities in the marketplace, and connecting you with industry leaders. We offer monthly web design challenges with cash prizes, weekly skill-building events, and exclusive guest sessions featuring top professionals in web design.
So, if you’re ready to take your skills to new heights and join a community of like-minded creatives, now’s the time! Hop over to NewForm for more opportunities to learn, grow, and design.
Get cracking and show the world what you're made of! And always remember, you don't just create websites—you craft experiences. 🚀


