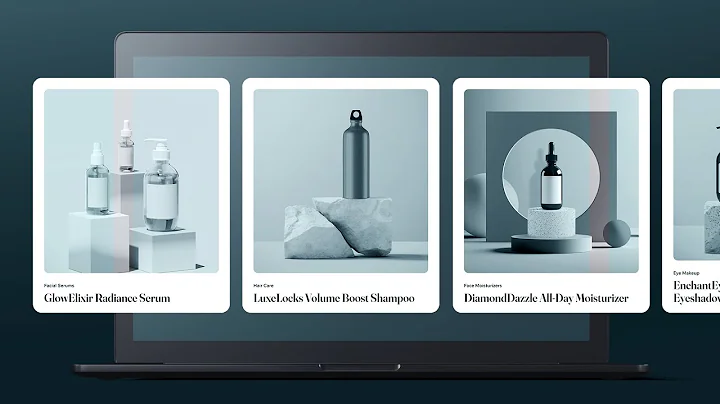
Creating Horizontal Scroll for Repeater | Wix Studio
Creating Horizontal Scroll for Repeater | Wix Studio
Hey there NewForm community! We're plunging into one of the trickier yet incredibly satisfying aspects of web design today—creating slick horizontal scrolling using repeaters. If you've been in the game long enough, you know that scroll effects can really level up the user experience—making your site not just a looker but also fun to interact with. So, buckle up because we're going to unravel the art of crafting a horizontal scroll effect with a repeater in Wix Studio that's dynamic and data-connected.
Why Horizontal Scrolls?
If you're wondering why you'd want a horizontal scroll, think about showcasing a gallery, new arrivals on your e-commerce site, or even a portfolio. It's engaging and, when done right, can hold a viewer's attention like nothing else. Vertical is so yesterday, right?
But is it always easy? Not quite. The trick lies in balancing aesthetics with responsiveness—a feat needing careful navigation of design barriers and technical nuances. Lucky for us, Wix Studio makes weaving these intricate pieces together worry-free.
The Basics: Getting Started with Repeater on Wix
Before we delve into the nitty-gritty, let’s understand what a repeater in Wix Studio does. Essentially, repeaters allow you to display data collections efficiently, presenting them in customizable formats. It’s like a magic tool that reflects database items dynamically adjusted for your design specifications.
What we'll accomplish today is connecting repeaters to a database, not merely placing items statically on a page. This means your design can seamlessly grow with your content without manual adjustments—music to a designer's ears!
Setting Up the Canvas
1. Pre-designed and Hero Sections: Start simple by setting up your hero section and any additional pre-designed sections on your page. These work as the anchoring points for content flow.
2. Creating a Distinct Section for the Repeater: Navigate to the advanced mode option in Wix; trust me, you want this. It'll let you play around with elements more freely by cementing your creativity in a sea of features. Create a new section specifically for your repeater, marking it initially with a contrasting background color—just so you don’t lose sight of it.
3. Dropping in the Repeater: Use the 'Add' panel, and make space for the repeater. Resize it accordingly. The crucial aspect here is ensuring the repeater is wide enough to house all items in a horizontal scroll manner without wrapping to the next line.
Aligning Containers and Setting Up the Scroll
Once you have the framework settled, it’s time to get technical:
- Container Resizing: Paste the container within the repeater, giving it a two-row grid structure. This includes defining heights with relative units like '1fr' and 'max-content' for responsiveness.
- Adding Gaps and Padding: Have a vision for the spacing? Use consistent padding to keep elements uniformly spaced, which coherently aligns aesthetics with functionality.
- Anchor the Repeater Horizontally: Each repeater item should rest in responsive units. Adjust width for precision and see your layout come into harmonious view.
Data Connection Made Easy
Connect the dots between your repeater and data sources. Pop into your projects collection and bind relevant fields like Project image, Category, or Title. This empowers your design to automatically integrate and update items housed in your database – keeping it as fresh as a daisy!
Let's Get Sticky
An important lesson here involves setting the container to sticky—an effect that leaves an impression! You'll want your container to remain visible as users scroll past certain sections. This is done by pinning the sticky container and calibrating it to match screen height. Using a combination like `100vh - 50px` as the container height accounts for any fixed elements—smooth sailing all through.
Animation and Fine-Tuning
Whew, we’re almost there! But first, we need animation to make this horizontal scroll pop:
- Placing the Animation Trigger: Choose strategic points to introduce animations tied to scroll positions. A tip—consider utilizing dummy repeaters that mimic content length, giving your primary repeater smooth, predictable drifting as intended.
- Move with Precision: Whether adjusting by percentages or specific units (VW/VH), alignmanaging these metrics ensures your dynamic repeaters scroll effectively across any device screen.
Optimizing Presentation (And Practical Tips)
Our final checks revolve around user experience. By now, you should have the horizontal scroll producing just-right vibes on all fronts. Reduce blank space, ensure items animate elegantly, and voila! The result will be a refined and polished scroll-optimized webpage ready to dazzle.
Conclusion
And there you have it – a post dedicated to harnessing horizontal scroll magic within Wix Studio. Each chunk of progress reflects meticulous design thought processes, and it pays off beautifully in creating a seamless interactive experience.
Ready to Dive Deeper with NewForm?
At NewForm, we’re all about helping you unleash your potential. Join our community full of opportunities—from web design challenges with exciting rewards to networking with industry champs. Jump into our myriad of events, workshops, and make sure you explore our treasure of resources. Ready to grow your skills and network? Visit us at NewForm and be part of something amazing. Let's keep building phenomenal sites together!
Until next time, happy designing!


